Butterfly Crochet Pattern
Remember how I told you I love to crochet? I wanted to share this super cute little pattern with you that I found in a book. I made this one just so I could show you how cute they are. If you want to try to make one also - I have written all the steps down. :) Not sure if this is a beginner pattern though. It might be. TRY IT!
Okay. So here is the BRIMSTONE BUTTERFLY!
Stitches explained: TR = TRIPLE CROCHET (wrap yarn over hook 3 times) TRTR= TRIPLE TREBLE (wrap yarn over hook 4 times) Picot = ch 3. slst (slip stitch) in 2nd ch. from hook.
You are going to need three different colors. One for the wings, body and then the color for the little circles on the wings. You don't need it but its cute with it. :)
All of these stitches are going to be worked along the ch 13 that you will make.
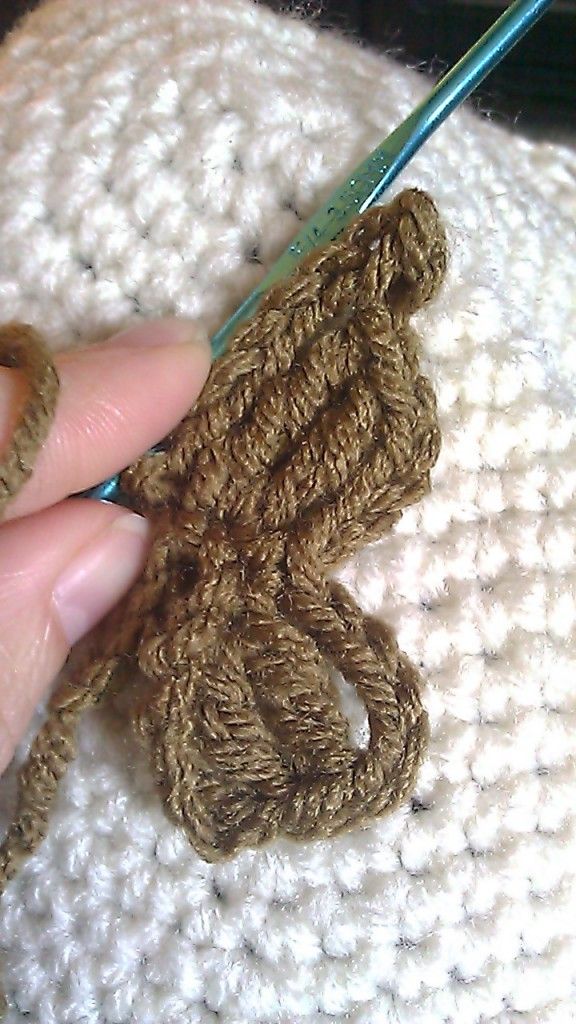
WINGS: Using color for wings Ch 13. skip 5th. 2 tr in next ch. Ch 5. 1 sc in next st. Ch 4. (1 tr, 1trtr) in next ch. make picot. (see stitches explained above) Ch 6. slst in next ch. (See photo A. That is where you should be at this point.) Ch 9. slip stitch in 2nd ch from hook (2nd picot made) (1 trtr , 1 tr) in next ch. Ch 4. 1 sc in next ch. Ch. 5. 2 tr in next ch. (should only have one ch left) ch. 5 slip stitch in last remaining ch. Fasten off.
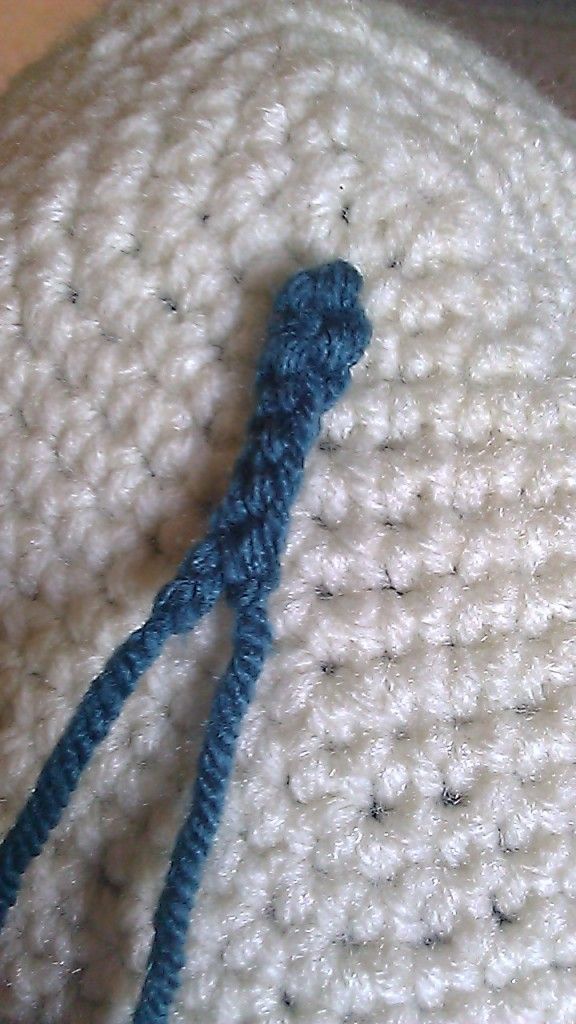
BODY: Using color for body, ch 7. skip 1ch from hook. Sc in next. Slip Stitch in next 4 stitches. Fasten off.
In order to get the antennas, I took my tapestry needle and carefully took the strings that were hanging there and stitched them very loosely up through to the top. Making them stick out like antennas. Then trimmed them. But be sure to keep it loose. You do not want to shorten the body more than it is by pulling the strings through too much. Hope that makes sense.

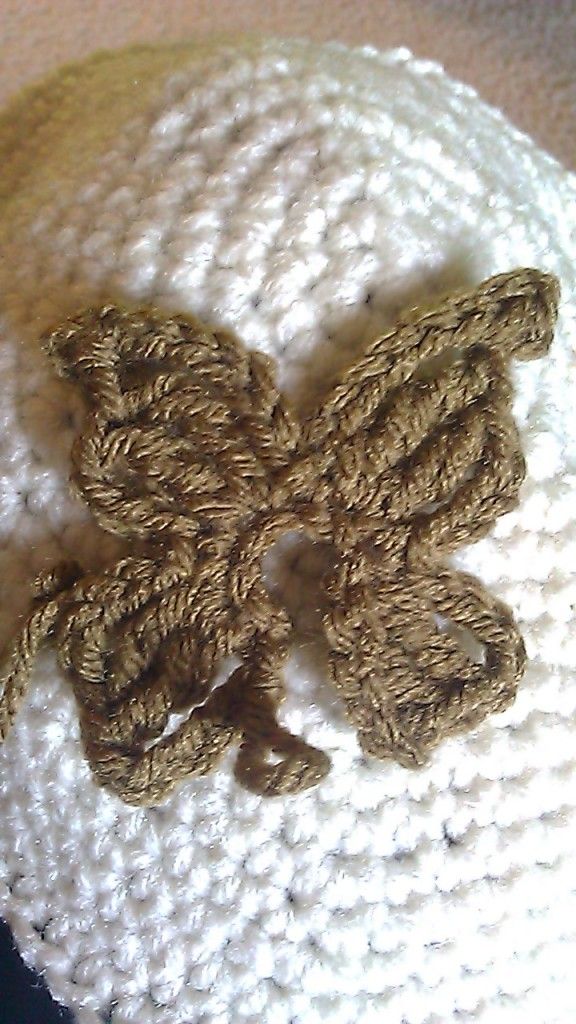
What I did next was I took a tapestry needle and where I had fastened off in picture B - I sewed the two bottom wings side by side. Basically I just connected the corners. I then placed the body over the center and sewed it on with the yarn that was left from the fastening off process. (What would I call that? The tail?) If I wanted to I could have glued it also. Depends on how you want to do it I suppose.

For more great free Crochet patterns visit - Crochet Pattern Central
A
B
BODY: Using color for body, ch 7. skip 1ch from hook. Sc in next. Slip Stitch in next 4 stitches. Fasten off.
What I did next was I took a tapestry needle and where I had fastened off in picture B - I sewed the two bottom wings side by side. Basically I just connected the corners. I then placed the body over the center and sewed it on with the yarn that was left from the fastening off process. (What would I call that? The tail?) If I wanted to I could have glued it also. Depends on how you want to do it I suppose.
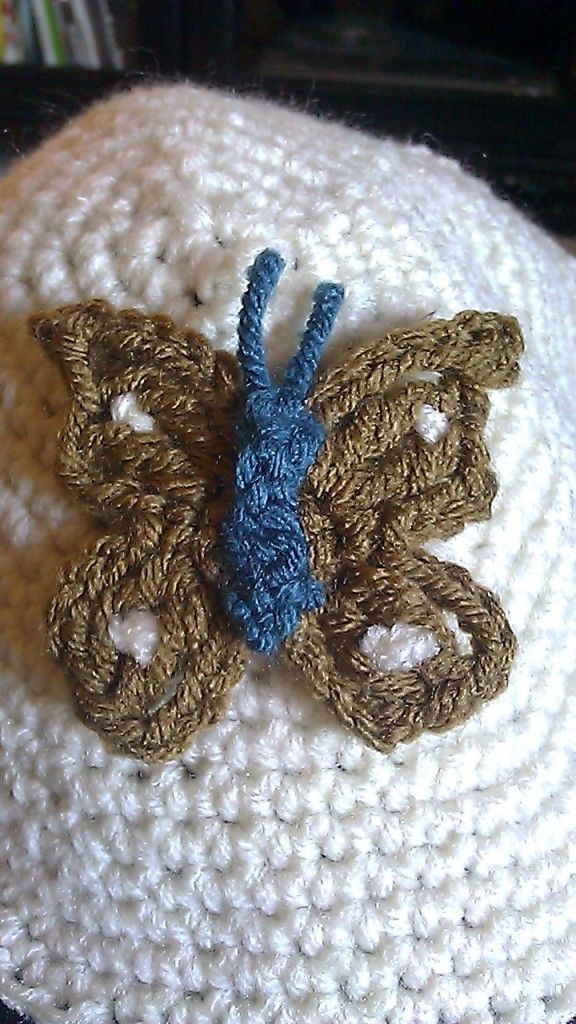
Finished butterfly. I am not good at the whole embroidery part but I threw a little cream in the wings. I think it turned out really cute! I think it would be cute too if you maybe took some beads and just glued them on to the wings or even felt? Ew how about little buttons? So many ideas. I think I will turn this one into a little pin. I love pins!
For more great free Crochet patterns visit - Crochet Pattern Central


finally found a butterfly i like thankyou.bren
ReplyDeleteYour pattern is beautifull!
ReplyDelete